Blog #302
One of my goals is to be a highly effective professional speaker, facilitator, and coach while also being a hermit in the high country of Colorado 95 percent of the time. Even three years ago, the headwinds to achieve this goal would have been much stronger. But today, it is not only possible but also easy to set up.
To be clear, content, facilitation, expertise, and being 100 percent present are all baseline requirements for success. Technology can’t fill gaps in these points. Technology can provide access and opportunities for intimacy, from any place with a good Internet connection. These tools allow me to help others and still get out and hike, ski, or bike every day. Some days it feels like I am getting away with something.
This post will talk about how I have set up my Zoom studio in our mountain home nestled in the woods at 10,000 feet and will cover tools and mechanics.
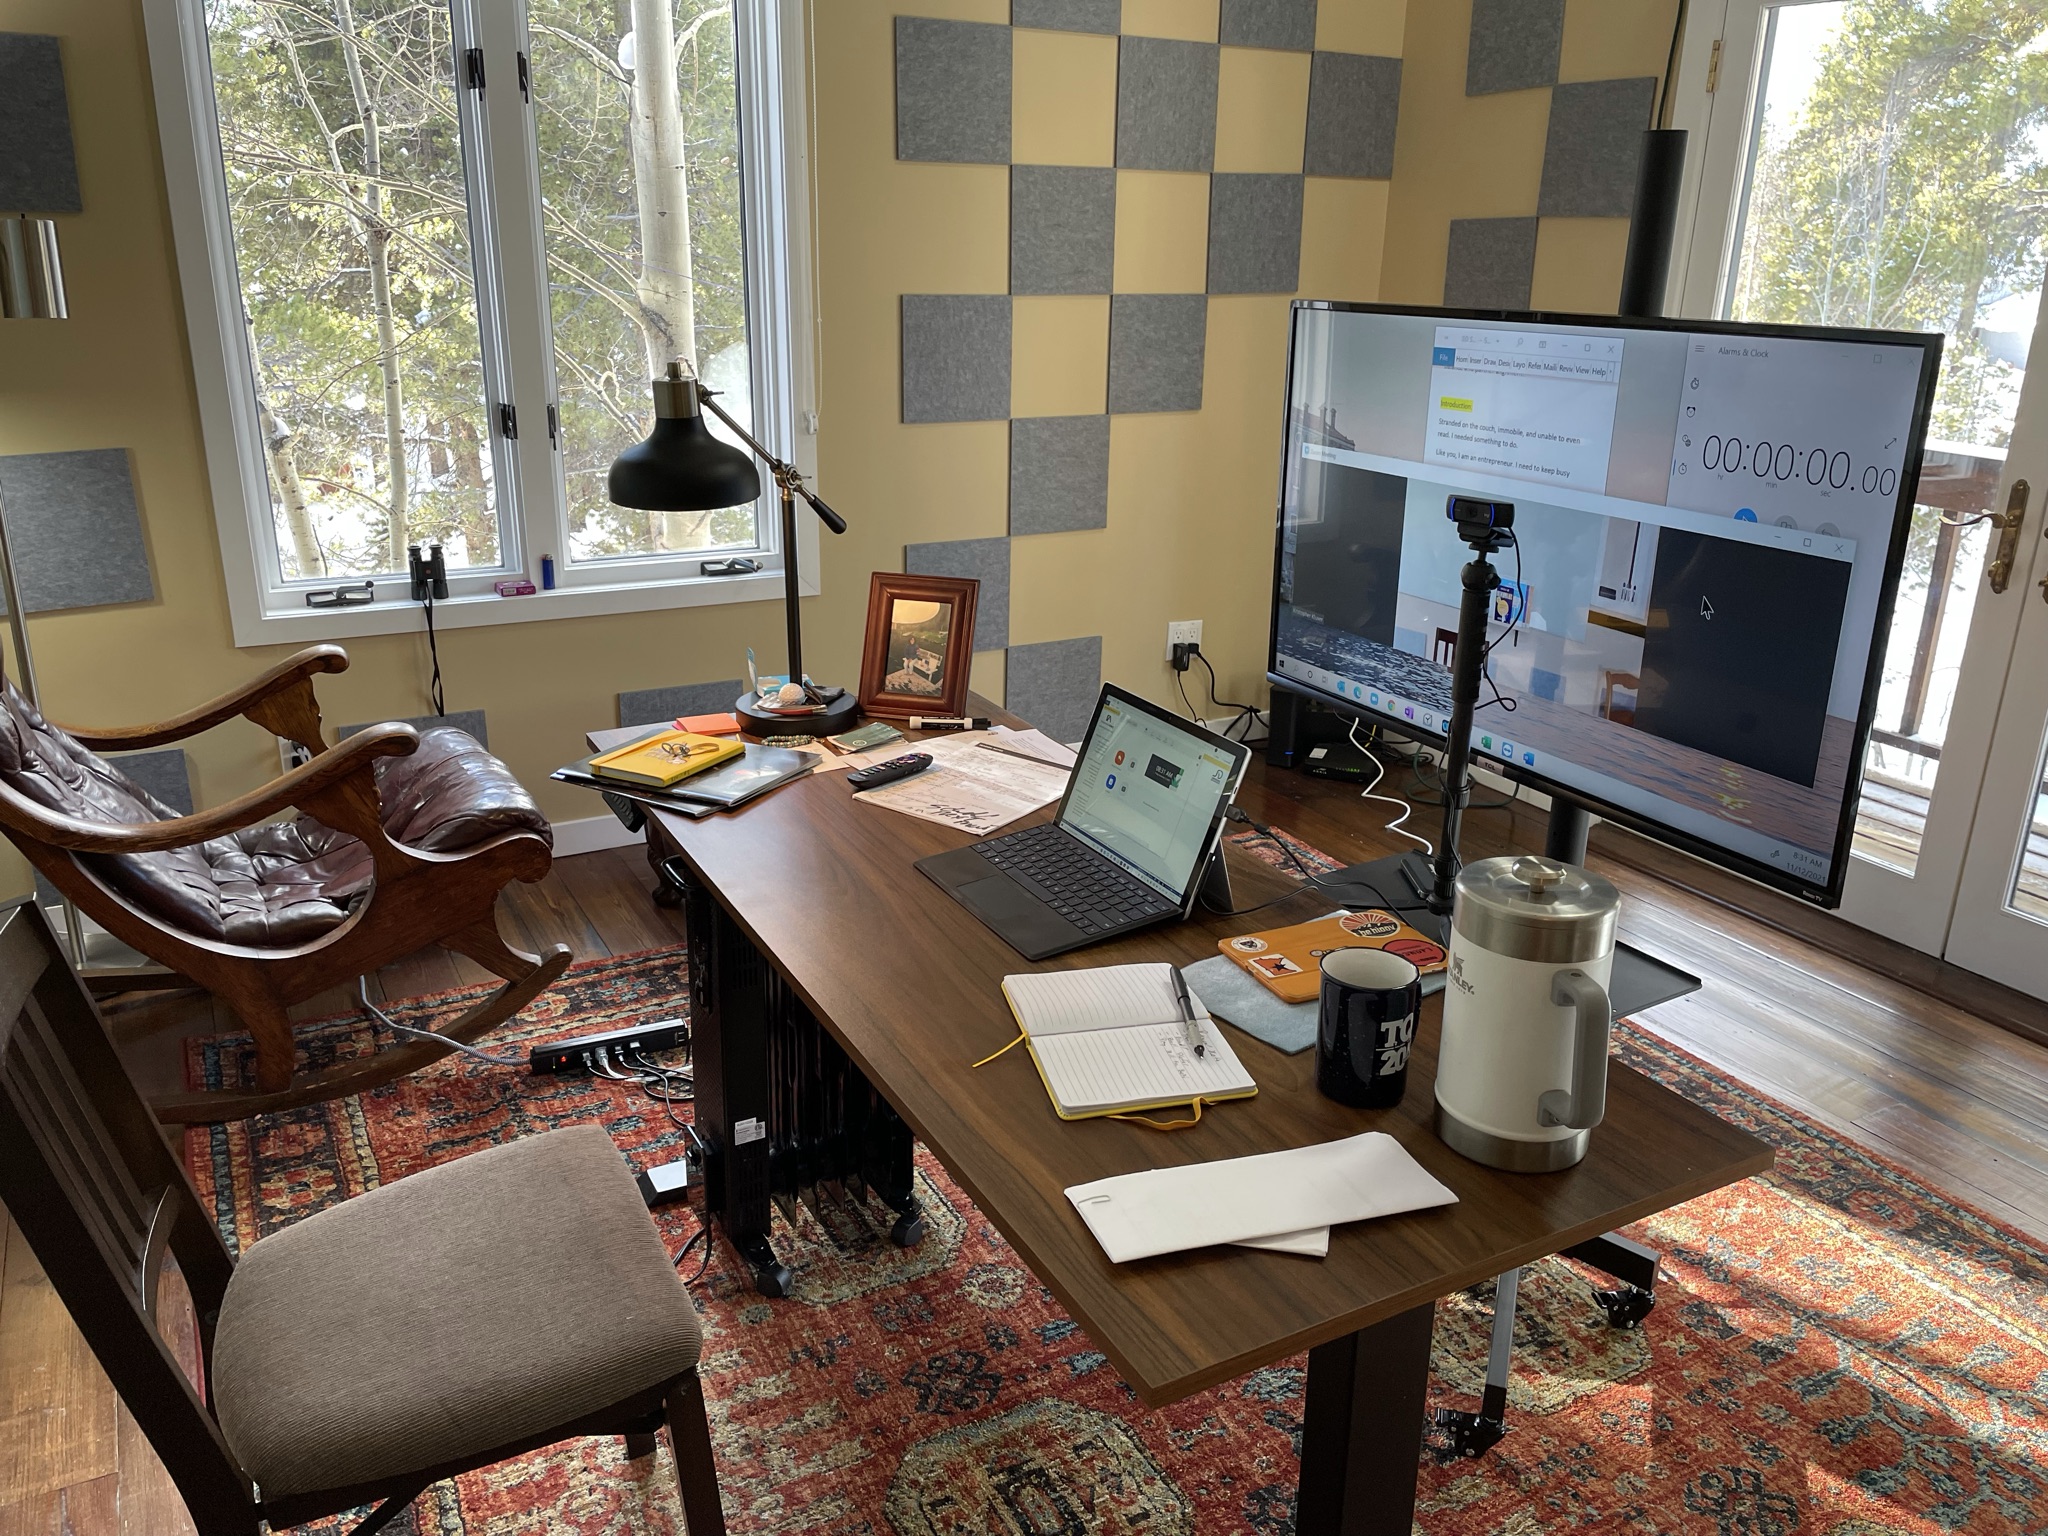
- Computer: I use a regular Microsoft surface. The camera is marginal; however, it has a USB port, and I add a camera.
- Camera: I use a simple, higher-end Logitech camera.
- Multiple screens: I like the simplicity of using a large-screen TV as my second screen, and I use a ScreenBeam to connect. This device plugs into an HDMI port on the TV and you’re all set.
- Monopod: I use a simple monopod to mount the Logitech camera.
- Rolling cart: I have the TV/second screen mounted on a rolling cart so that I am looking straight at the center of the screen from my chair. I can also adjust it to a standing height.
- Standing desk: I have a standing desk that is easily adjusted to move up and down as needed.
- Studio lights: I use standard large studio lights from Amazon: one placed high in the center and one off to the side.
- Background lights: I have floor lights at either side on the back wall to wash out any shadows cast by the other lights.
- Acoustical wall-mounted tiles: I placed these 1×1-foot tiles from Amazon in a checkerboard pattern throughout most of the office.
- Whiteboard: I use a 4×8-foot sheet of glass with KILZ paint on the back for a whiteboard. It works great but is very reflective for Zoom.
- Kaptivo: This is a wonderful screen-sharing device that captures and shows the whiteboard in real time.
- Hardbacked chair: This chair is good for posture, and the camera will not see the back of the chair, as it would my office chair.
Here are a few tips for a successful Zoom call:
- Pay attention to the placement of your camera. I put the monopod on a shelf of the rolling cart so the camera is effectively in the middle of the screen. This makes it easier to keep my head up straight and maintain eye contact.
- Zoom has multiple additional settings. If you are sharing a deck or screen, set it to show your image in a small window in the corner of the screen. It will keep people engaged (I just learned this one).
- Zoom has a setting that can record the gallery view only in a second recording. This additional recording will allow you to review the meeting, watch body language, and see where people are staying engaged or drifting off.
- Test, test, and test again. Keep testing and playing with your setup. This not only will give you familiarity with it when things do go sideways, but it will also keep you from being distracted by the tools.
- Avoid distracting backgrounds. Make sure your backgrounds have a purpose, or use Zoom’s blurred option to avoid the distractions.
- Be energized and animated. You have a small window to reach people. Bring the energy to your call.
- Be present. I am preaching this with everything. It is critical with virtual meetings. You have to be there and be focused, or people will feel it.
Let me know what works for you. If you have any comments or suggestions don’t hesitate to reach out.
Keep Smiling,
Kris